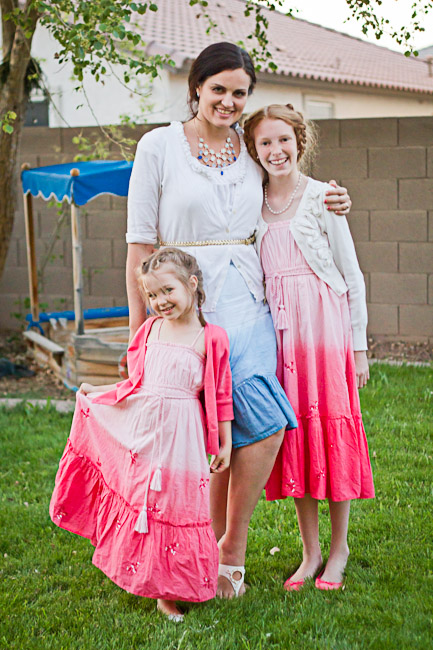
Has Spring come to your part of the world yet? It is feeling very much like spring here in sunny Arizona. My only fear is that it will make way for summer far too soon. I showed you a few pictures last year of our Dip-dyed ombre Easter celebration, but didn’t get a chance to share very many details, so I thought I would do that now and give you plenty of time to make some Easter plans for this year.
As you likely know by now, I love to have a theme to work with for holidays as well as parties and other festivities. You may have seen our Carrot Easter, or Earthy Natural Easter, or our EGG-stra Special Easter.
Ombre and dip-dying have been such hot trends and it seemed like Easter–the original dyeing holiday–seemed like the perfect showcase for them.
Let’s start with fashion because that is where I started. My plan was to find some plain white cotton dresses and dip-dye them. In my experience with dye, fabric needs to be 100% cotton or the dye will fade and end up looking dingy. And surprisingly, I just couldn’t find what I was looking for in little girls’ dresses. I guess they don’t make a lot with 100% cotton fabric anymore. However, Old Navy did have these dresses already dip-dyed. Since it was what I was going for anyway, I bought the dresses and found a white cotton skirt in my closet for my DIY dip-dye project.
But I didn’t stop at the skirt. I took a bunch of plain white cotton napkins, originally from IKEA (some with stains) and dip-dyed them as well. Half were blue like my skirt, and half were the warm pink tones of the girls’ dresses. To get the right shade of dye I mixed fuchsia and orange dye together. I did these in a bucket in my sink with really hot water.
To get the dip-dyed effect, you first need to get the entire napkin wet. You can drape the fabric over the side of the bucket and let the dye “crawl” up. The effect will be lighter the higher it gets. For a more defined striped look, you can hold the fabric in the dye at different lengths for different intervals. Start with your high water mark and leave it in for just a few seconds. Pull it up a couple of inches and leave until distinguishably darker. And keep going. Colors will likely fade when rinsed so you may want your dark color to look quite dark when dying. I think I kind of combined methods and did a quick dip to get more color higher. Then I let the end sit in the dye for quite a while (30 mins or more?)
I really love the finished effect on the napkins.
I did the same technique on paper to create the dip-dyed egg-shaped place cards.
We accented the place settings with gold chargers that took the dip-dyed look up a notch in sophistication. The ombre striped table runners were from Target.
I even talked my sister-in-law into bringing ombre jello for the occasion.

And let’s not forget the eggs, which were the inspiration for this Easter theme! I dye them much the same way I did the napkins–holding the egg in the dye at each level until it achieve the desired shade.
And there you have it! An Easter celebration that is on-trend but still classic! If you like this idea, check out the rest of my EASTER inspiration.


Super cute dip dyed details for Easter. I just did a bunch of dip dyed onesies for my son. Love using RIT dye!
Consistently assess various shops before purchasing a game.
Where can you choose shortcuts to offer a better tactical position?
If at all possible, use an HDMI or DVI cable to get a transparent picture.