Guest post by Kendra’s sister, Trina, who isn’t only insanely creative, but also extremely cheap–that runs in our family, too! 🙂


Don’t worry, his paint was washable.


I feel unqualified to talk about home décor because I don’t do too much of it, and what I do do is more often dictated most by how inexpensively it can be done. So, here are a couple of cheap/simple projects that I recently did to try and put a little fun in my little boys’ room.

I found these cute painted wooden shapes half off at a craft store, so picked them up even though I wasn’t sure what to do with them. What I eventually came up with were these wall hangings. A couple of years ago I bought some basic wooden frames on eBay for a different project I was doing (they ended up being about $1 each), and these five were left-over. I just painted them with acrylic paint to match the room. The fabric was scraps left from when I made my boys’ quilts. I cut rectangles and then sewed another fabric on the edges, and ironed the seams. I hot-glued the cloth onto foam core board cut to fit inside the frames, then put the frames and fabric boards together. Finally, I just hot-glued the wooden transportation shapes to the center. My 5-year-old thought he was pretty cool when I let him help operate the hot glue gun a time or two.

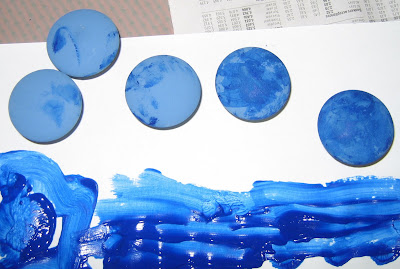
The other project was for a dresser we refinished a while ago. We removed the ugly 70’s door-knocker-style drawer pulls, and I wanted to put something cute on to match the colors in the boys’ room. Initially, I found these really adorable transportation-themed drawer pulls on eBay, but they didn’t last a month before they were breaking. I debated spending $5 each for some other cute ones online, but couldn’t bring myself to do it. Instead, I bought plain wooden knobs and painted them with a basecoat of blue.

When the blue was dry I painted little pictures on the knobs, and outlined them with a fine Sharpie. The final step was to spray with some clear lacquer. I actually messed up a couple with this last step because the Sharpie ran. I’m not sure if I applied too much of the wet lacquer, or if I should have let the ink “dry” a little more. I was able to mostly fix those knobs by re-painting over the Sharpie, and was extra careful when I lacquered them the second time.
For more fabulous and frugal decor ideas, don’t forget to check out The Shabby Nest’s Frugal Friday Party!
(Visited 26 times, 1 visits today)


Very cute ideas! Love the room! Thanks for sharing!
I can’t believe you painted those tiny pictures on the little knobs… they look great! Cute framed pics as well- I”ve seen cute shapes at hobby lobby too. Thanks for the ideas!
Great job! I am all about funky knobs, or Sknobs as I like to call mine. The Sharpies and varnish do not mix well. Even on canvas, been there…tried it! You did a wonderful job, I bet your little man loves them!
~Misti
Awesome! Thanks for linking up! And I do think I’ll do another one of these parties in the not too distant future. 😉
Those wall hangings are adorable!
🙂
You did a great job on a budget! Everything is cohesive and bright. I decorate on a budget, too. I pretty much restrict myself to 75% off or second hand. 🙂
Great ideas! I can’t believe you painted those little transportation pictures on those knobs, nice job! Thanks for sharing!
The knobs are adorable! Makes me want to have a boy!
What a beautiful room! You did a wonderful job!
Thanks for sharing…
xoxoxoxo
Great job- super cute
Super cute! Great ideas.
I love that your little one was involved in the crafting part! ADORABLE
Cute little paintings on the knobs! And adorable framing idea! I am always wondering down the aisle with all the wooden cut outs trying to think of uses and give myself a reason to splurge on a pile of them 😉
aww i love how this room turned out! when i was young, my dad and i used to go around the house painting pictures on the power sockets on walls with oil paint 🙂 It was really fun to do as a kid! good old times..
Thanks for sharing!
very cute! Love the knobs! Jen
Love the knobs! They really spruce up the dresser. Becki